Normal Maps for High Poly Detail
The main drawback of painting a bump map and then converting to to a normal map is that you can't make your model appear to be more round and have more shape. A bump map can only make the surface look like it's higher or lower than it really is. A bump map allows you to add tight surface detail, but you can't give your model the illusion that it uses tens of thousands of more polygons than it actually has. The technique presented on this page is a bit more complex, but the results can be stunning because your going to use the normal map to give your low poly model the look of a high poly one.
Here are the basic steps for creating a normal map from a high poly model:
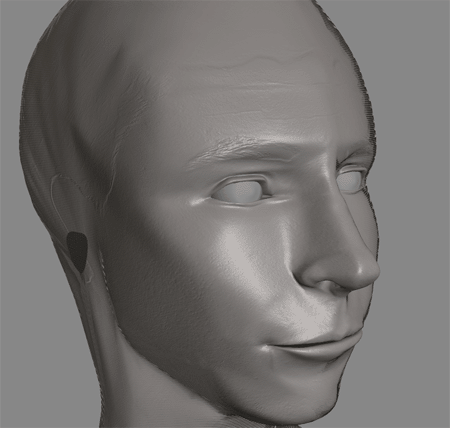
- Create a highly detailed version of your model. It doesn't need UV coordinates or any materials, just lots of detail created with polygons. This head model has more than 30,000 polys. It also uses a bump map, but yours doesn't have to.
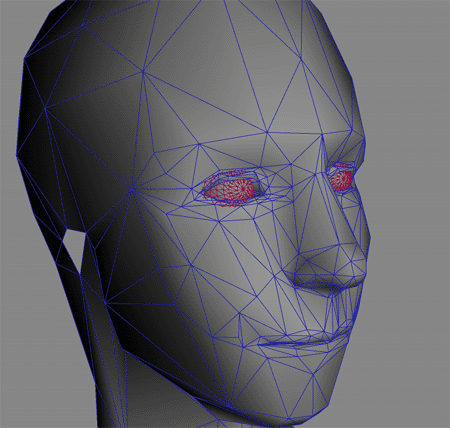
- Create a low poly version of your model based on the high poly version. This version needs to have UV coordinates applied. The head below has 632 polygons.
- Use a program to bake the detail of the high poly model into a normal map based on the UV coordinates of the low poly model.
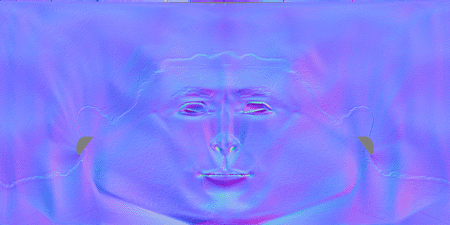
- Now we take our low poly model . . .
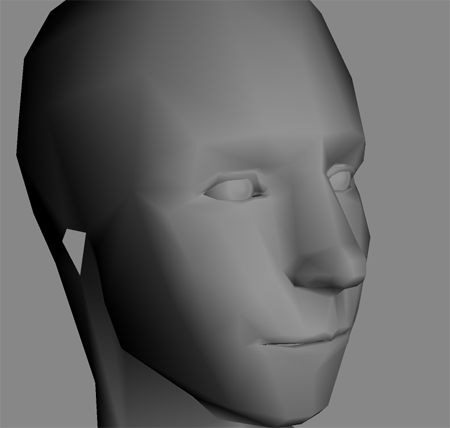
. . . apply the normal map to it, and render with a per-pixel lighting shader. Remember, this model still has only 632 polygons. The results are pretty good. Especially when we compare this to the image above without the normal map applied.
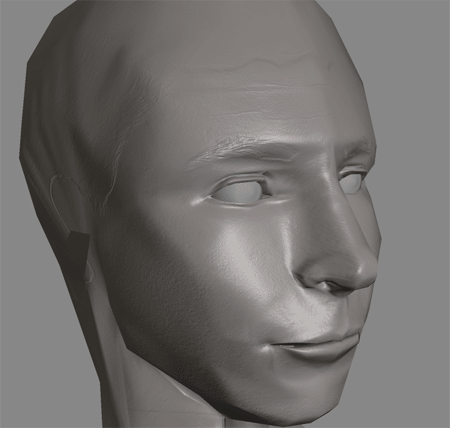
You end up with a low poly model that looks like the high poly version. You probably already understand how to create the high and low poly models and how to apply the UV coordinates. If you'd like more information on the modeling and unwrapping steps, take a look at my more advanced normal mapping tutorial. For now I'll just cover the step that might be new to you: Baking the high poly model detail into a normal map
The following portion of the tutorial is only required if you are using an older version of your 3D app - like 3ds Max 5 or 6, or Maya 4.5 or 5. If you are using 3ds Max 7 or higher, Maya 6 or higher, Softimage, or Lightwave, you can create normal maps right in your 3D app without needing to export your model to an external program. My advanced normal mapping tutorial has more details on that.
If your 3d software can't generate normal maps internally, you can use ATi's NormalMapper program. You can follow the link on page 3 of the tutorial to download this program. Once you've downloaded it, unzip it to your Program Files directory and install the included exporter plug-in for the 3D software you're using. This will allow you to export you models from your 3D software for use in the NormalMapper program. I use Max so I placed the file called "MAX5ExportNMF.dle" in the \3dsmax5\stdplugs folder. You can also use the Maya exporter file called, "Maya45NMFExport.mll."
Note: If you're using a program other than Max or Maya, there is an alternate version of ATi's NormalMapper adapted by Michael Bunnell which allows NormalMapper to recognize OBJ format. You can download it here:
http://www.seanomlor.com/mikeb/
Just export your objects in OBJ format instead of NMF and follow the rest of the steps.
Next, follow the steps below to create a normal map.
- Export Your High and Low Poly Models in NMF Format
ATi's NormalMapper uses a model format called NMF. I think it's a format that ATi created. In order for the NormalMapper program to create the normal map, you need to export both the high poly version and the low poly version in NMF format. First, be sure that you've installed the NMF exporter Max plug-in that I mentioned above. Select your high poly version and choose "Export Selected" from the File menu. Save the file in the directory where you installed the NormalMapper program. Mines is C:\Program Files\NormalMapper\Rel. Be sure to give your model a name that indicates that it is the high poly version. Repeat this process for the low poly version.
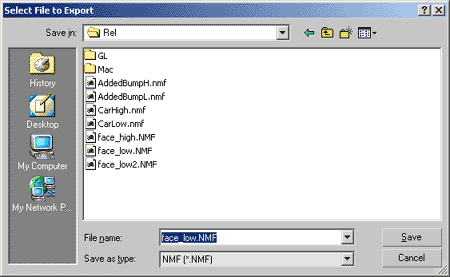
- Open Command Prompt and Browse to NormalMapper
Unfortunately, the NormalMapper program is a command line applciation so you'll have to open a Command Prompt window to run it. In the Windows Start Menu, choose Programs - Accessories - Command Prompt. This will open a DOS like window for you to type commands. Theh first thing you need to do is go to the directory where the normal mapper program is. Type "CD .." and hit enter. Repeat this process until your command line just says C:>. Now type "CD Program Files\NormalMapper\Rel" That should put you in the directory where NormalMapper is installed (if you put it in the same place I did.)
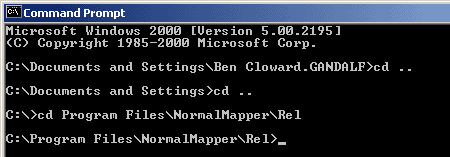
- Run the NormalMapper Program on Your Models
Here's where you get to type a bunch of cammands. First type "NormalMapper.exe" followed by the name of your low res model and then the name of your high res model. Then type the width and height of the normal map you want to create. Each height value must be a power of two (64, 128, 256, etc). Finally, type of the name that you want to give your new normal map. The normal map will be created in Targa format so it makes sense to end the name with ".tga". My command line looks like this:
NormalMapper.exe face_low.NMF face_high.NMF 1024 512 faceN.tga
Now hit enter. NormalMapper with spit out a bunch of information and begin to generate your normal map. There are a lot of other command line options that you can use to tweek your results, render in higher quality, solve problems, etc. See the ReadMe file that comes with NormalMapper for instructions on how to use all of the options.
That's it! Once the program finishes running, your normal map is done. Now the cool part comes when you apply the normal map to your model using per-pixel lighting. Just go to the next page of the tutorial and follow the instructions there. You can also jump to the last page for a list of programs that can display your model and normal map using per-pixel lighting.
Back Next
Page 1: Introduction
Page 2: Enter the Normal Map
Page 3: What You'll Need
Page 4: Using Normal Maps for Bump Maps
Page 5: Normal Maps for High Poly Detail
Page 6: Applying Normal Maps to Your Model
Page 7: Additional Tips and Tricks
Page 8: Links to Additional Information